GET STARTED! / Digital Training / Video Quizes
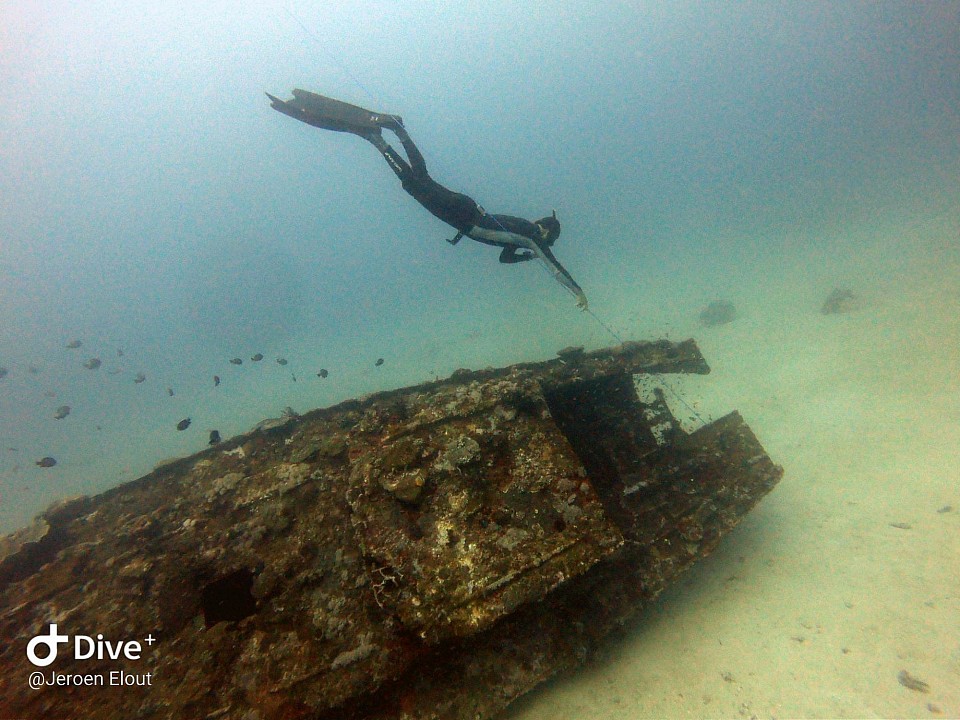
Sabang Wreck, Puerto Galera, Philippines
My FCOA | FCOA app | FCOA Full Training Manual 2026
Maybe you're preparing for your upcoming lesson, or you plan to train by yourselves, either way it all starts here. Download the FCOA logbook & training guide 2026
Our 10 FCOA lessons are available on youtube and provide a step-by-step approach. We recorded the videos on our mobiles and consider them a first draft.
For coaches: Use this platform to prepare and refresh yourself before teaching students.
FCOA FREEDIVING LESSON 1 till 10 QUIZZES / VIDEOS
Video Quiz 1 / 1A float / 1B apnea / 1C Protocol / 200m swim
Video Quiz 2 / "Water safety, Rescue & Self-help"
Video Quiz 3 / "Navigation"
Video Quiz 4 / "Ropework" and "Weight use"
Video Quiz 5A / "Coach training" / Bare minimums
Video Quiz 5B / "Medic First Aid for divers"
FCOA Enviromental Diver quiz
Video Quiz 6 / Lesson 6: "Depth Preparation & Line training"
Lesson 6B: The FCOA mask drill (our entry prerequisite for SCUBA)
Video Quiz 7A / "Exhale dives"
Video Quiz 7B / "Physics of Exhale dives"
Video Quiz 8 /"Lost at sea"
Video Quiz 9 /"Advanced Equalization & Reverse Packing"
The Divers Ear
Video Quiz 10 /"Lead Coach Training"
Lifeguard Quiz / Lesson 11: "Wild water training"
FCOA spear fisher quiz
FCOA Pilot survival training
The Discipline Tutorials (Audio)
STA Static Apnea
DNF Dynamic No Fins
DYN Dynamic
FIM Free Immersion
CNF Constant Weight No Fins
CWT Constant Weight
VWT Variable Weight
FCOA/CMAS SCUBA QUIZES
Diver Medical / Participant Questionnaire
CMAS/FCOA Scuba Open Water Quiz
FCOA Scuba Panic Proofed
CMAS/FCOA Scuba Advanced Quiz
CMAS/FCOA Scuba Rescue Quiz
FCOA Independent diver quiz
FCOA Scuba Gear Maintenance Quiz
CMAS/FCOA Scuba Divemaster Quiz
CMAS/FCOA Scuba Instructor Quiz
CMAS/FCOA Scuba Advanced Instructor Quiz
CMAS/FCOA Scuba Instructor Trainer Quiz.
CMAS/FCOA Nitrox Quiz
FCOA Oxygen Provider Quiz
FCOA In Water Recompression Treatment (IWR) preparedness Quiz
FCOA Compressor operator Quiz
FCOA Gas Blender quiz
FCOA DECO DIVER Quiz
FCOA Nitrogen Narcosis tolerance training
,FCOA TRIMIX DIVER Quiz
FCOA SAILING QUIZES
FCOA Sail & Dive quiz | personal sail log
FCOA SOLO SAILOR quiz
FCOA Radio Operator quiz
FCOA SAILING INSTRUCTOR quiz
FCOA COXSWAIN quiz
FCOA CLIMBING QUIZES
FCOA Imporvised Climber Quiz
FCOA TOP ROPE CLIMBER quiz
FCOA LEAD CLIMBER Quiz
FCOA RESCUE CLIMBER Quiz
FCOA CLIMBING INSTRUCTOR Quiz
ADDITIONAL USEFUL VIDEOS
How to measure your lung volume
Improvisation during emergencies "In water chest compression" Possible?
Risk Management: Interesting Links
Freediving and Decompression sickness
Delta P risk (working near pumps and outlets)
Notes of Caution
Topics:
- The risk of diving versus other activities
- Drowning
- Secondary drowning
- Group Think
- Depth adaptation
- Hands free solutions
- Boat Traffic
- Hyperventilation
- Packing
- Why not to breath air from a Scuba diver
- No Freediving after Scuba
- Decompression risk
- Physical Contact
- In fresh water we float less
- Skipping logical steps
- Equipment Dependency
- Learning scuba unprepared
- Bilharzia (Africa and India)
- Brain Eating Amoeba (India)
1. The Risk of Diving Versus Other Activities
There is no such thing as a zero-risk dive. Yet, the percentage of accidents in freediving is very small compared to scuba diving (reportedly 1.8 casualties per million recreational scuba dives). When comparing the risk of diving to other activities, it would be fair to say it's more dangerous than flying but less dangerous than riding a motorcycle.
Here are some statistics for other risky activities:
Motorized transport fatalities per 100 million vehicle miles:
- Motorcycles: 26.16
- Cars: 1.33
- Flight: 0.04
Other activities that are known to: shorten life expectancy by years:
- Smoking -13 years.
- Alcohol overuse -24 years.
- Obesity -14 years.
- Drinking sodas daily -2.5 years.
- Living with air pollution -2 years.
Most of us engage in activities that could potentially be fatal, yet we choose to do them anyway. As an educator, it's important to explain these dangers. However, the decision of what risks we're willing to take is personal. In this chapter, we will further explain how divers get into trouble and what they can do to avoid it.
2. Note of Caution About Drowning
Drowning is the second most common cause of accidental death. FCOA recommends keeping non-swimmers in shallow water, which is defined as water shallow enough for individuals to stand in. The water should reach no higher than chest level; however, knee-deep water is safer and sufficient for starting initial lessons.
Even in chest-deep water, people can still drown, especially if they have buoyant legs that make standing up difficult.
Before participants move to deeper areas, they should demonstrate their ability to swim 200 meters in shallow water without standing up. Additionally, they must complete the FCOA survival float challenge: "In shallow water, they must be able to remove and replace their mask and snorkel, and clear the mask and snorkel, without touching the bottom in a repeatable fashion.
3. Note Of Caution About Secondary Drowning
If someone has inhaled water into their lungs but appears fine afterward, it is crucial to keep a close watch on them. Water in the lungs can trigger a chemical reaction that draws more bodily fluids into the lungs. Some individuals have died hours after being rescued from a drowning incident due to this condition.
To ensure safety, the individual should either stay in the hospital under observation or be closely monitored at home. If monitoring at home, sleep nearby and set an alarm to check on them every 30 minutes. Listen carefully to their breathing. If you hear any sputtering or liquid sound, seek immediate medical attention.
4. Note of Caution on Group Think
Groupthink is a psychological phenomenon occurring when a group prioritizes harmony over sound decision-making, leading to irrational outcomes. Group cohesiveness may push members to agree without critical evaluation. An important 2015 Divers Alert Network (DAN) study revealed that 83% of drowned freedivers were with companions. Having a buddy does not eliminate all risks.
5. Note of Caution About Depth Adaptation
FCOA recommends limiting personal best depth increase to no more than one arm span per dive to allow for the body and mind to gradually adapt to the increase in pressure.
6. Note of Caution: Keep Your Hands Free (hands free solutions)
Cameras should not be tied to the wrist. We recommend tying cameras to the chest, so that your hands are free when performing rescue drills. Bungee chords are often the favored for securing cameras. For your students it would be good to have a bundle of straw rope available that they can use to tie their own hands-free solutions.
7. Note of Caution About Boat Traffic
Boats kill divers and swimmers every year. Especially jet skis since they are often operated at high speed by unaware tourists. But also, surfers and sail boats can kill swimmers, you won’t hear them coming. Being visible is your best defence but it’s not a guarantee. Learn to identify collision courses far in .advance (in FCOA lesson 8) and practice swim sprints and exhale dives to increase your ability to get out of the way of a fast-approaching boat that just didn’t see you.
8. Note of Caution About Hyperventilation
Hyperventilation: In the freediving world this is when you do more than 2 breath ups.
When we hold our breath? The O2 level in our body goes down and CO2 level goes up. When CO2 is high enough it triggers your brain to breath, then the CO2 reduces again and O2 comes back up.
When you hyperventilate the O2 does not really go up much higher cause your blood is already saturated by default. But your CO2 drops lower and lower. Now if you hold your breath you can hold it longer. You might never feel the trigger to breath. You could deplete your O2 without warning. This is called the SHALLOW WATER BLACKOUT. Athletes have drowned in their bathtubs and swimming pools due to this so don’t take it lightly. If you want to experiment with hyperventilation, then your bed is the safest place to do so. When you bring it to the water make sure you have a competent safety budy to look after you.
9. Note of Caution About Packing
Packing is an advanced technique used to force extra air in the lungs. The benefits of it are debatable. Many freediving instructors advice against the practice because when done exesively it could cause a lung overexspention injury. For those that like to try out packing for the first time it’s advised to not pack more then 5 times. If this feels comfortable during the whole dive, then one extra pack can be added per subsequent dive. (One pack is equal to one mouth volume that gets pressed down in the lungs)
10. Note of Caution About Scuba Diving
Scuba divers should not offer compressed air to freedivers. A freediver taking a breath of compressed air at 10 meters would risk his lungs to over expand to double the size and rupture on the way up. The moment a freediver breathes compressed air he is no longer a freediver, he should now follow scuba diving protocols including safety stops and slow ascent rates while breathing at a normal rate.
11. Note of Caution About Freediving After Scuba
To reduce decompression sickness risk, refrain from freediving, flying, or mountaineering post-scuba diving. Adhere to the recommended surface intervals by scuba diving organizations. For example, PADI recommends a 12 hour surface interval after a single scuba dive and an 18 hour surface interval after 2 scuba dives.
12. Note of Caution About the Risk of Decompression Sickness
For recreational freedivers the risk of decompression sickness (DCI) is neglectable. How ever for competitive freedivers there is a small risk, this risk can get reduced by applying appropriate surface intervals between deep dives. Yet the chance is always there. DCI can cause numerous symptoms depending on where the nitrogen bubbles get stuck in the body. What the symptoms have in common is that the patient has likely never felt them before. To treat DCI the patient should breath 100% Oxygen while his vitals are being monitored. The first aider could call DAN (Divers Alert Network) for treatment tips and to find out if a decompression chamber is currently available in the region. In Water Recompression (IWR) is something that could be part of a DCI treatment plan especially for remote locations.
13. Note of Caution About Physical Contact
When it comes to touching each other we all have different boundaries. Yet when you teach freediving or swimming there will be moments that physical contact could be practical and even necessary. Make sure your student is ok with it. If not sure just ask. For example: “Do you want me to support your back while you practice the survival float”?
14. Note of Caution About overtalkative people.
Engaging with talkative individuals can sometimes be a bit distracting, and in certain situations, it might even affect safety. They can interrupt the flow of the lesson. That's why, as a coach, it’s important to address this with clarity and authority. Key phrases to the group can be:
Let’s stay on topic and discus other topics at another time.
We only have 20 minutes left so please keep your questions to the minimum and follow my lead.
But if it is one particular person that still keeps talking and interrupting then you likely have to address them personally without others hearing your conversation. Key Phrases can be:
Can you reduce your questions by 75%?
May I challenge you to practice some vipassana and not talk this morning unless asked questions?
15. Note of Caution About the Difference in Buoyancy Between Fresh and Salt Water
It’s easier to float is the sea then in a pool. It’s possible that a person floats in sea water but sinks in fresh water.
16. Note of Caution About Skipping Logical Steps in Learning
Often students are excited to get out there and see the underwater world. Yet they still lack swimming skills. Take your time for it. If you can’t comfortably swim 200 meter yet then you belong in shallow water.
17. Note of Caution About Equipment Dependencies:
Check your self on the following dependencies:
- Mask dependency: Feeling anxious without, not wanting to dive without
- Snorkel dependency: Finding it hard to swim longer distances without snorkel
- Fin dependency: Without them you feel handicapped, you seem not able to move
- Nose clip dependency: you fear or are not used to water going up your nose
- Diveline dependency: without the line you find it hard to go down
- Dive watch dependency: For knowing your depth, you're not yet used to counting arm spans or sensing and interpreting pressure on your years and the size of your lungs.
- Dive buoy dependency: You’re not yet familiar to recover from your dive withouth holding on to something floating
- Dive buddy dependency: Your uncomfortable swimming and diving by yourself, often relying on others
- Calm water dependency: When there is a current or when there are waves you become uncomfortable
- Wetsuit dependency: Even in warm water you feel uncomfortable without your wetsuit.
Many former non-swimmers have learned to freedive without acquiring basic swimming abilities. However, they become helpless if they lose their fins or struggle to breathe without their snorkel. More advanced divers often heavily depend on the diveline, the buoy or their watch.
How to overcome dependencies?
-
Become aware of your dependencies, which once are you ok with and with once you want to change?
- Come up with ways to safely practice without the item you depend on even if it is just for 10 minutes per session.
- Gradually increase the level of difficulty
- Repeat no equipment divers for recency
The first thing to do is to call it out and be aware of your dependencies and ask your self if you want to do something about it. Your best defence is to regularly practice dives without equipment. With the right skills, you won’t depend on any specific gear. Practice frog kicking in all directions and try diving without a mask until it feels
The survival float sequence: To be practiced in shallow water
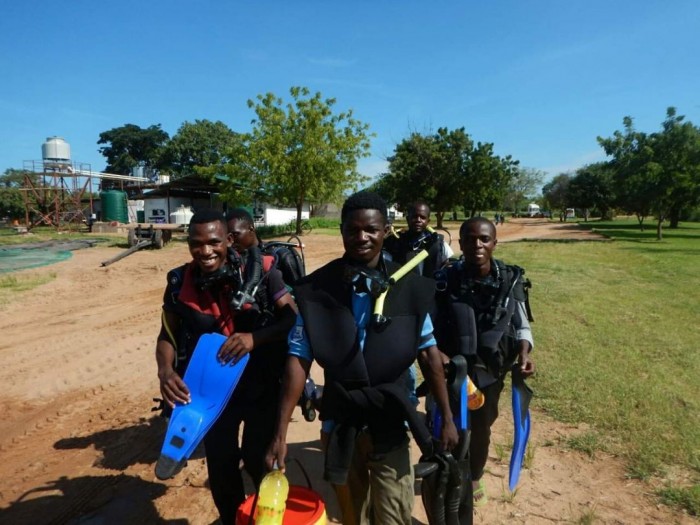
Our guys in Zambia
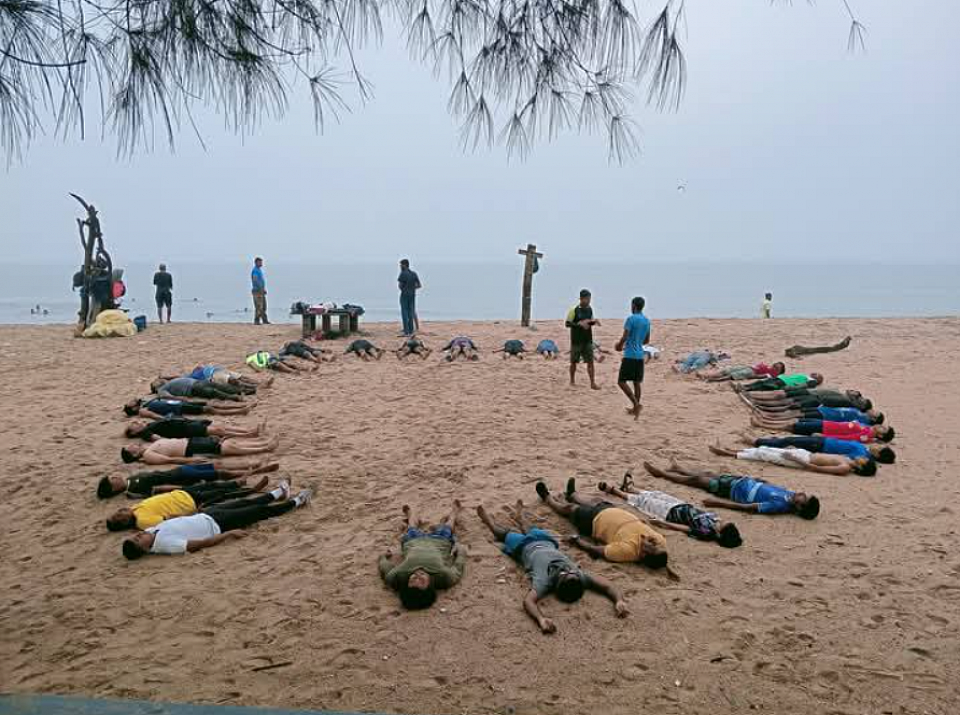
Optimized breath holding. Relaxation slows the heart rate.
The FCOA / CMAS SCUBA COURSES, from open water to Instructor
Since 2023: FCOA/CMAS SCUBA PROGRAM The FCOA SCUBA PROGRAM is exclusively designed for FCOA COACH members. It makes a lot of sense to learn freediving before scuba, this adds to safety and assures you start your scuba adventure with confidence. For any level of FCOA SCUBA certificate you can also obtain the equivalent CMAS certificate for an additional 1700 php per certificate. FCOA also offers the SCUBA program as a Remote Verification Training (RVT)
FCOA Sailing courses in the Philippines and in India
Sicnce 2024
FCOA SOLO SAILOR PROGRAM
(The most updated version of this program can get found under digital training on fcoa.online)
There is some overlap between what divers need to know and what sailors need to know. To start this program, you should first attend FCOA lesson 1 till 8 and become an FCOA FREEDIVER. Also, you have attended the 2-day FCOA SAIL & DIVE program
The following sailing related topics should have been covered in your previous FCOA trainings:
Survival floating, swimming and diving in FCOA lesson 1
Rescue & self-help in FCOA lesson 2
Navigation in FCOA lesson 3
Ropework in FCOA lesson 4
Medic first aid in FCO lesson 5
Lost at sea procedures and use of Navionics in FCOA lesson 8
You did 2 days of sailing during the FCOA SAIL & DIVE program
The additional topics we will cover are:
Making a sail plan with the use of Windy, weather forecasting and tidal forecasting.
Communication options for a sailor
Marine law
Navigation
Weather
Terminology
Anchoring
Boat maintenance
To complete this program, you must pass the FCOA SOLO SAILING EXAM and you must log 10 solo sailing hours. We recommend to sail 2 of those hours at night.
FCOA Climbing Courses
Since 2025 FCOA offers CLIMB TRAINING
FCOA Improvise Climbing
Most people in the world don't have access to specialized climbing gear. Also, when you're on top of a burning building, you will just have to use what is available. For this training, all you need is a random 15 meter rope from your local hardware store. (Ø 10 mm)
180.000 people per year die due to fires. Many could have saved themselves if they would have been able to rappel from their burning building
Risk Management:
During this training we recommend to not climb higher then 2 meter and to keep an old mattress under your climbing area. The development of climbing skills takes time. It's good to practice new skills close to the ground. Use common sense and develop your judgement. Take responsibility of your own safety and don't just trust anyone till that trust has been earned.
This improvised climb training is available for anyone that can get online and is meant to reduce the risks involved in our natural climbing journey. This training is somewhat different than most other trainings where they will be very specific about what specialized equipment to use.
We humans are primates and just like Orangutans and Chimpanzees, it's in our genetics to develop climbing skills. By doing so we can reach the best fruits and stay away from the wolves. Sometimes we fall, get injured and some even die, but most of the time we just bruise and evolve. As much as possible learn from mistakes that are already made by others. Good for you if you can find a climbing instructor. But if not, don't let it stop you from practicing improvised climbing basics at home.
Some Definitions
Top rope climbing: This is the safest way of climbing with a rope from the top, if you slip or fall, right away you're hanging in the rope.
Free style climber. Any climber that climbs without specifically agreeing with a competent belayer to be belayed.
Lead climbing: the first person to go up to deploy a rope. This is at a higher risk, when falling the climber will fall twice the height that he is above his last anchor.
A competent belayer (FCOA definition): A belayer that has at least 3 times responded appropriately to your unannounced fall in the last year with the equipment types and environment he/she is familiar with
Backup Belayer: An experienced belayer that assist when the primary belayer is still developing his skills. The back up belayer will hold the rope that comes from the belayer so in case the belayer lets go, the backup belayer will prevent the climber from falling.
STUDY TIPS
THE 10 LESSONS
The best way to progress through the lessons is to first watch the video lesson, then read the text and then make the quizzes.À
All FCOA participants should register fully on FCOA.online this to make sure they all agree with the liability release and the statement of understanding to protect both, the coaches and FCOA. Once signed up we call them FCOA members. As FCOA member they can:
1. keep track of the lessons they have followed, and they can request of certificates.
2. They can keep a record of their personal best performances.
3. They can keep records of their spiro meter information
You could ask members to send you a screenshot of their fully filled in profiles.
We encourage members to watch the FCOA video lessons and to complete the relevant quiz before their upcoming dive.
When guests arrive for their lesson let them know where to change and where to place their belongings. Give them a logbook or tell them to download it from fcoa.simdif.com. If they rent equipment you could ask to keep an ID in exchange to assure they return the gear. Let them try the equipment in front of you to check if it's the right size and if it's operational. Testing fins they should do while sitting. Remind them not to walk with fins on and to keep the mask away from sand. Those with own equipment, let them show it to you to see if it’s appropriate equipment. Hand out some mask defog options.
FCOA lesson 1
COACHING NOTES ON LESSON 1
Lesson one is the most intensive lesson of all. The dry briefing is the longest. Watch out to not overload students with information. Separate what they NEED TO KNOW from what's NICE TO KNOW. For the nice to know facts you can refer them to Google and Youtube, so that you can focus on the topics they really need to know.
THE BULLET POINTS OF LESSON 1
Dry briefing
1. Optimized Breath Hold
2. Mask & Snorkel use
3. Equalizing
4. Dive protocol & blackout response
5. Rules of Rotation
6. The Duck dive
Waterwork
1. The survival float
2. Splashing
3. Full turn / 360
4. Gliding (I'm a rocket)
5. Gliding breast stroke
6. Frog kick
7. 200 meter swim
8. Mask clearing
9. Snorkel blasting
10. Handstand attempt followed by snorkel blasting
11. The survival float challenge (Mask off & on)(Optional)
12. The first dive / breath hold
13. Dive with blackout response
14. Duration Dive
15. Deeper Dive
16. Duck dive
17. Freediving tour (Optional)
18. Use of fins (Optional)
The bare minimum requirement for members to request a certificate of attendance of this lesson is that they have been introduced to all the topics above. It can and should all get done in shallow water if members are not yet cleared for deeper water. Repetition of skills in deeper water is optional. They don’t need to have mastered any of the skills, but they should have an understanding on how to further practice those skills on future dives.
Water work
1 dive protocol + blackout
2 attempt to equalization
3 attempt to duck dive
THE SPIROMETER (A simple tool to measure and understand exhale volume)
As participants arrive you could do the spirometer measurement with them. It's a great ice breaker and it assures that no one is just sitting and waiting for the official class to start. The spirometer is goofy, nerdy and it makes participants giggle. At the same time it touches Archimedes and Boyls law in a very playful and visual way.
After they exhaled into the spirometer, let them push down the spirometer so they can actually feel the buoyant force.
1 Tell them they get 1kg of flotation out of every liter.
2. Tell them that an average complete exhale is ¾ of the lung volume. Ask them to calculate their lung volume.
3.Tell them that a dive to ten meter will compress their lungs to half the size, ask them how much heavier that will make them.
ARM SPAN MEASUREMENT
For participants to know how deep they are, they could count their armspans on the way up. Measuring armspans could be another time filler while participants are still arriving. If you choose to not spend time to actually measuring armspans then the average armspan for man and woman can just be stated. Most man have an armspan of around 150 cm. You could ask them how deep they were if they pulled up 4 times (It's 6 meter). Most woman have an armspan of around 133 cm. You could ask them how deep they were if they pulled up 3 times (It's 4 meter)
GETTING TO KNOW EACH OTHER ( 5 to 15 minutes)
Once the group is complete an introduction round is a good way to bond with the group. The usual questions being, What’s your name, Where you from and what is diving to you. Depending on group size and time available you could either ask more or less.
THE MISSION STATEMENT ( 1 to 2 minutes)
Introduce the FCOA program, and ask participants to read 3 missions out of their logbook, shortly elaborate on each mission.
OPTIMIZED BREATHHOLD ( 5 to 10 minutes)
You could say: “I’ll take you buy surprise, hold your breath RIGHT NOW!
The surprise breath hold is a great way to kick-start your briefing. It should be unannounced and with no explanations otherwise it would not be a surprise. Call out the 10 second marks. Once they are done, tell them they did great, no matter how short or long they did hold. Tell them “the surprise breath hold is the time you have to escape a sudden boat capsize”
Show them where to write ✍️ down their surprise breath hold in their logbooks.
Then explain them the two ways to prolong our breathhold:
1. The breath up: Make them copy your breathing: 2 full inhales and exhales, to assure having the freshest air in the lungs.
2. Relaxation: Tell them: “You have billions of cells in your body, they all need oxygen, if you slow them down they will need less oxygen. Let’s measure how relaxed we are right now by measuring our hearth rate”. Then let them lay down and relax for 2 minutes. After that measure the heart rate again. Followed by the breath up and again a breathhold.
❤ Measure the heartrates for 15 seconds and multiply it by 4. Help those that can’t find their heartrates. Make them write ✍️ it down in their logbook
Demonstrate how to relax, mention:
1. To keep the body relaxed and as flat as possible to reduce the hearts workload.
2. To keep the arms straight to have the least obstruction in the blood vessels.
3. To keep the eyes closed since the eyes also use oxygen.
4. To relax the mind with sleepy thoughts or through meditation.
During the 2 minutes relaxation don’t talk and try to keep the environment as quite as possible.
After 2 minutes with an easy voice tell them to remain relaxed but to gentle find the ❤ heart rate again. Tell them if they cannot find it that they should not worry about it, since we want them to remain calm. After the 15 second measurement tell them to remember the number and relax again.
Let them follow and copy the sounds of your breath up. Then on the count of 3 tell them to breath in as deep as possible and to hold as long as they can. Let it be quite for the first 30 seconds, then call out the 10 second marks. Tell those that finished to sit up and encourage those still holding to keep going and push for their limits.
Comments you could make between the 10 second marks are:
• Dream away, you could actually try to fall asleep
• Push for it, there is nothing unhealthy about pushing for it
• Keep your eyes closed so they don’t use oxygen
• If you feel your tummy move, that’s your diaphragm, it’s normal
• Try to take control of your diaphragm, try to keep it still
Once they all finish, help them to fill out✍️ their post relaxation heart rate and the dry breath hold.
Explain the term Dry Breath hold in comparison to a wet breath hold being easier due to the mammalian dive reflex.
Now take some time to also fill out ✍️ the Lung volume and the arm span.
1. MASK FITTING, CLEARING & SNORKEL BLASTING (2 to 10 minutes)
This is an ideal topic to be presented by a coach in training. Off course they should only present it, if they are prepared for it trough a three-part roleplay. The participants should copy the demonstration (monkey see monkey do). Give participants the time they need to fix their hair and figure out how to tighten the mask. The demonstration should include:
1. The vacuum test by inhaling through the nose and listening for air leaks.
2. Strap placement above the ears and tightening/loosening the strap.
3. The hair check with 2 hands, one to pull the mask skirt forward, the other to swipe the forehead free of hair.
4. Mask clearing by exhaling through the nose.
5. Snorkel blasting: twice with a slow inhale in-between.
6. When not using the mask, keep it around the neck.
7. Different ways to defog
2. EQUALIZATION (2 minutes)
This is another topic that easily can get presented by a coach in training provided he gets prepared trough a three part roleplay.
Keep it simple. It’s a huge and never ending topic but right now it should get explained in less then 2 minutes. The briefing should include minimally:
• Valsalva
• Jaw movements
• Swallowing
• Bad ear up
• You should never feel pain. If you feel pain your to deep already.
3. DIVING PROTOCOL & BLACK OUT RESPONSE ( 1 to 3 minutes)
This should include:
1. Diver signing to the safety diver: You look at me, the safety diver confirms with an ok sign.
2. As the diver dives the safety starts counting
3. Checking if the diver is conscious trough: Tapping, Rope tugs or the use of the grouper call.
4. As the diver comes up he should attempt to recover trough the snorkel. This is a skill that takes time to learn. Ironically most freediving programs don’t teach it while scuba diving programs consider it a mandatory and valuable skill. Participants that don’t get taught how to recover trough the snorkel will miss out on proper airway development. Once the skill is mastered participants can choose to either recover trough the snorkel or with the head out of the water.
5. After the divers first breath, the diver and the safety buddy have a combined responsibility to make eye contact.
6. The safety buddy asks if the diver is ok with an OK sign. The diver replies with an OK sign. The safety buddy now counts 5 seconds on his fingers in front of the face of the diver. Then he once again asks if the diver is still ok.
7. The diver pretends to black out. The safety buddy should turn him around by the shoulders without making the common mistake of trying to get behind the unconscious diver. This should get done gently but without delay.
(At this stage we let students recover from their breath holds with their subconscious natural breathing. Some trainers teach the “recovery breath” or ‘Hook breath”. Be aware that this method doesn’t have much scientific backing. It’s a discussion and a method we will discuss in detail in lesson 6 with more advanced students. For introduction students this topic could lead to confusion, time loss and information overload)
FAKING UNANNOUNCED EMERGENCIES
Encourage participants to fake unannounced emergencies when ever they like, especially if they feel their safety buddy is not focused. Before faking emergencies make sure that you:
1. Only fake emergencies that fit in the scope of the so far covered lesson. In lesson one by example we only deal with service emergencies so don’t pretend to be blacked out under water.
2. Only fake emergencies if it will build the confidence of the safety buddy. If the safety buddy is already exhausted or stressed, then adding a fake emergency to it could potentially be traumatizing and it would reduce their confidence.
3. After the executed rescue first state everything that was done right and good and then add how it can even be better and faster and more gentle next time.
4. RULES OF ROTATION (Optional for groups) (10 to 15 minutes)
The rules of rotation assure that the most amount of dives can get made in the least amount of time and that with minimum talking. All participants get an equal amount of practice dives and safety duties. The participants should practice it on land first. Ideal group size 4 to 6. Make sure all participants understand that:
1. They need to personally call out their diver numbers in a clockwise direction.
2. They need to know who their safety will be. (Second last diver to the right)
3. They need to know what their GO TIME is.
4. They need to know who they will provide safety to.
5. They need to understand that after their dive and after getting checked, they need to get ready to become a safety diver them selves. They need to make eye contact with their diver so that the diver can continue his meditation without having to demand his safety buddies attention.
Do two rounds with them. The first round is to get used to the flow. For the second round add the concept of escorting and add a blackout during the 5 second check. The safety buddies should learn to focus on their divers especially when other dive buddies are conducting blackout responses. Encourage participants to fake blackouts unannounced. Especially if their safety buddies are not paying attention.
6. THE DUCK DIVE (2 minutes)
It’s another stand up topic where you make the participants move. As with all topics, Don’t just talk to about it, make participants move. We first practice duck dives in chest deep water by making hand stands. This briefing should include.
• Hand stand attempts in chest deep water
• Tumbling
• In deeper water, face the rope and stay near it.
• Don’t forget to equalize
• Tumble turn
• Ascend along the rope since that’s where your safety buddy is waiting for you. And it protects you against boat traffic.
• Surface next to your safety buddy
THE WATER WORK OF LESSON 1
NOTE OF CAUSION ABOUT DROWNING
Drowning is the second most common reason for unnatural death. FCOA recommends to keep non-swimmers in shallow water (this is water shallow enough to stand up in). The water should reach no higher then chest level, yet knee deep water would be safer and deep enough to start the first lesson.
In chest deep water people could still drown especially if they have buoyant legs that makes standing up complicated. If you have a participant with this challenge then better practice in knee deep water until they learn to stand up. For them to practice standing up in chest deep water they have to bring their knees to their belly button in order for their body to rotate to a vertical position, only then they will be able to bring their feet down to the bottom. As a coach to experience this challenge, tie some empty water bottles to your legs and try to stand up in shallow water.
It's the recommendation of FCOA that before participants move to a deeper area they should proof their ability to swim 200 meter in shallow water without standing up. (No fins and no mask) And they should show the ability to execute the FCOA survival float challenge: “In shallow water they must manage to remove and replace the mask and snorkel and clear the mask and snorkel without touching the bottom”. They should be able to do this in a repeatable fashion.
In practice many coaches prefer to take students out to a deeper area before the swimming skills have evolved. The stated reasons for this are:
• If people pay for an introduction to freediving they won’t like to spend to much time on swimming practice. (Mind you, freediving can also get practiced in chest deep water)
• Snorkelling relaxes non-swimmers, it calms them down. Then if swimming gets practiced later they will already have lost some of their fear and tension. (Mind you this would also be the case if you just take them snorkelling in chest deep water)
Be aware that as a coach you get copied, if you as a coach allow participants to go to deeper water without them being ready, then other coaches will copy that and do the same. It per definition reduces safety.
While if you’re firm about keeping a standard then future coaches are also likely to stick to the same standard. Participants will be motivated to practice longer and harder to meet the requirements to go to deeper water. Once participants are allowed to go to deeper water they are likely to never practice survival swimming again. We have seen many examples of freedivers with more then a year of experience that once they loose their equipment they become very uncomfortable and panicked. Equipment dependence is something we should guard for. Practising freediving in chest deep water is really the safest practice of all.
Participants are better of to rely on their own swimming skills then to rely on the rescue skills of their coach. Every meter they learn to swim will grow their confidence.
If you do choose to bring a non-swimmer to deeper water then practice extreme caution. Be with them one on one and continuously monitor them for any sign of discomfort or stress.
When a participant panics it could be a sign that he/she got progressed to deeper water to early. Every panic leaves a little trauma and reduces the confidence of the participant. Also be aware that panic can be contagious and can spread trough a group of divers.
FCOA recommends to start every lesson with 15 minutes of no equipment training. witch can include:
1.Survival floating,
2.Gliding,
3 Breast stroke,
4. Frog kicking
5. The 200 meter swim attempt
6. The 50 meter head out of water and chat attempt
7. No equipment tie on at > 3 meter
For those participants that can do all this already during lesson one, ask them to help others to complete the 200 meter swim because many students need someone to walk right next to them to:
1. Remind them to stay on course,
2. to glide 6 seconds after each stroke
3. and to relax and chill if the heart rate goes up.
THE CHEST DEEP SEQUENCE ( 5 to 60 minutes)
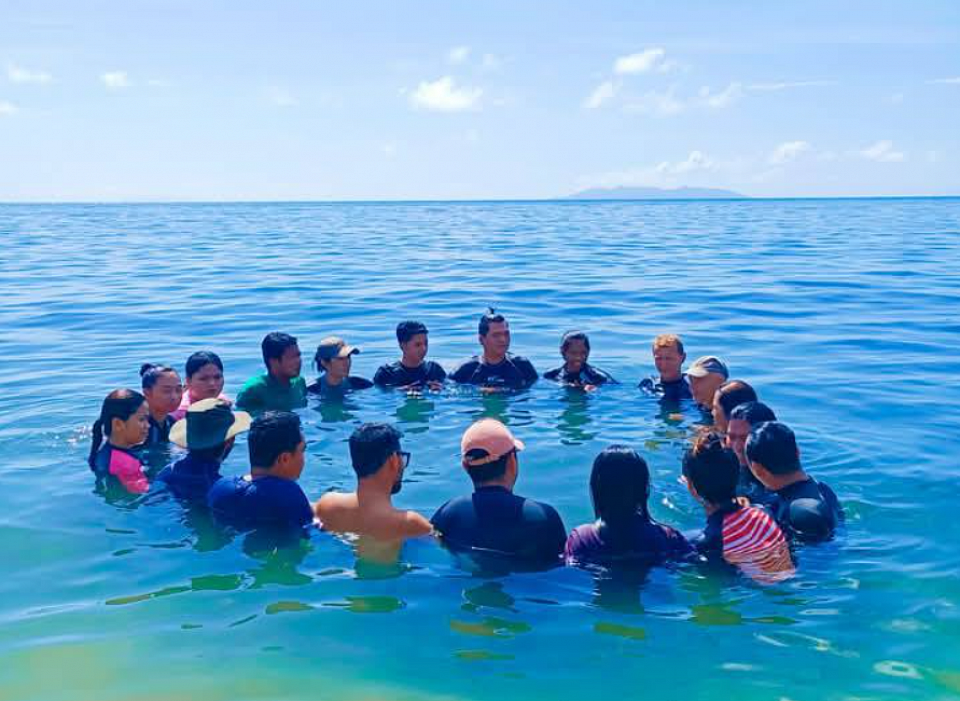
Participants should get told to leave there fins on land and wear the mask and snorkel around the neck before entering the water. We start in chest deep water with everyone. Make the group link arms to form a circle. (ARM UP). This assures we keep the group together especially when we are teaching in wavy conditions. It also makes clear that a new exercise is about to be demonstrated. Ask participants by turn to call out for the ARM UP so they learn to speak with volume and authority. Who ever demonstrates the skill should do so at the side of the circle and not in the center, this to make sure everyone can see the demonstration clearly.
If people say they can swim already then make clear that FCOA likes to cultivate a coaching mind-set and that during this part of the program they should study how to teach the survival float to their non-swimming friends. Tell the participants that today they will learn how to practice swimming skills by them selves, we don’t expect mastery, we spend a minute or two per exercise and then we move on. When they get told to ARM UP they should do so without delay. Get the group to buddy up since they should get in the habit of taking turns where one buddy practices the exercise and the other buddy takes a coaching role by supporting the back if needed, by giving suggestions and by making sure his buddy does not accidentally float towards a deeper area or towards other participants or towards other obstacles.
1. THE SURVIVAL FLOAT ( 1 to 3 minutes)
As you demonstrate the survival float at the side of the group, point out to:
1. Not move at all
2. Keep the ears under water
3. Hold the arms up ready for a stroke and to bring the bodies center of gravity nearer to the center of floatation.
4. Additionally for those that don’t float easily, tell them to keep their lungs big. They can still breath every 10 or 15 seconds but they would swiftly breath out and in and hold again to assure having the highest average lung volume while floating.
5. Cyclist and bodybuilders might have sinking legs due to the weight of their calf muscles. If this is the case they could bend their knees till their heels touch their buds. This will bring the center of gravity closer to the center of floatation and helps to stay in a horizontal position.
Some people can not float no matter what they try. Especially Africans due to higher bone density and body builders due to there high muscle to fat ratio could find that no matter what they do, they can’t float. In that case they could wear a wetsuit to ad some floatation so they could experience the float. Or they could focus on the swimming skills needed to stay on the surface.
2. SPLASHING IN THE FACE (2 minutes)
• Ask the survival floating participant if he/she can still hear you. Ask “Can I splash a wave in to your nose” If they approve then splash one good wave in to their nostrils. They should blow their noses without standing up. For many people when water goes up their nose it makes them panic so under controlled circumstances they should practice to keep their calm. Make sure participants don’t go in teasing mode and splash more then necessary. One well directed splash is more then enough for participants to practice this challenge.
3. THE 360 SCAN
Pretend your boat just sank and you’re in the survival float. Now to see what is around you start slowly turning your body by stroking one arm. While slowly turning look for:
1. The best help available
2. The most logical place to exit the water
You could also turn the body by turning t
FCOA lesson 2
COACHING NOTES ON LESSON 2
Lesson 2: Rescue & Selfhelp consists out of 5 hands on rescue skills. Motivate the participant to watch video lesson 2 and do the quiz to increase retention.
This lesson should not be delayed since it adds to safety. Often this lesson gets given the day after the introduction. The lesson is designed in a way that non-swimmers can participate in chest deep water.
For best retention first give a dry briefing to let participants practice those skills without getting distracted by waves, cold water or currents. Then repeat the 5 skills in chest deep water and for those that are ready the skills can get repeated in deep water.
If there is a time constraint, then the briefing can get directly given in chest deep water or even directly in deeper water on a buoy if the participants are confident swimmers and able to focus.
The 5 Rescue topics of lesson 2 are:
Lecture: Go over the Notes of Caution in the FCOA FULL TRAINING MANUAL
Act out:
1. Cramp removal
2. Panicked swimmer response
3. Transporting a tired diver
4. How to be a better safety buddy and
5. How to exit with an unconscious diver.
The bare minimum requirement for members to request a certificate of attendance of this lesson is that they have experienced
1. Panicked swimmer response
2. How to be a better safety : escort, rescue, displacement technique
3. Cramp removal
4. Transporting a tiered diver
5. Exciting an unconscious diver
It can and should all get done in shallow water if members are not yet cleared for deeper water. (If they have not yet done the 200 meter swim test) Repetition of skills in deeper water is optional. They don’t need to have mastered any of the skills, but they should have an understanding on how to further practice those skills on future dives.
6. LEG CRAMP REMOVAL
Demonstrate this and make participants copy you. Mention that you can also remove your own cramp by pulling your fin tip.
Having a cramp should not be a reason to leave the water. After the cramp is removed just continue at a slower pace. Also mention that to prevent cramps:
1. Hydrate before the dive.
2. Stretch before the dive.
3. And take in potassium (bananas) before the dive
2. RESPONDING TO A PANICKED SWIMMER.
This might be the most important rescue skill and it’s a prerequisite for coaches to be able to respond calmly and methodically to a panicked swimmer in deep water.
As a coach you will sooner or later have to deal with panicking swimmers. Tell the participants that “A panicking swimmer wants to climb out of the water and will try to climb on top of anything they find including you. People have drowned trying to rescue panicking swimmers, so what to do If he gets a grip on you and locks his arm around your neck? …Blow out completely so you start sinking. The moment you start sinking he will let you go because he does not want to go down with you, he wants to climb on top of things that float! Now get behind him and once again put your palms together, place them in his neck and your fingertips towards his ears, keep his mouth above water. From this point onwards you got to get him talking. As long as you can keep him talking, he will not get back into a panic”.
You can start with: " I got you, what is your name? Can you hear me properly? Where are you from?
Shall we slowly swim to the shore?
Every sentence should be a question to demand the person to think and answer leading him away from the panic. Once he is calmer you can ask him to hold your shoulders.
In that way you can actually see where you are going and now you can also use your hands to swim. Now there are three points to address:
1. Don’t push me down ok? You would want to instruct him to not push you under. Tell him that only his mouth needs to be out of the water and not his whole body.
2. “You like to swim along and just move your legs a little”? Now the panicking swimmer has the feeling that he is part of a team effort and that makes him feel less helpless. Panicked swimmers are often embarrassed about needing help so the more they can do for themselves the better.
Once you can stand:
3. “Would you give me one minute to show you a colourful fish? Persuade the person to spend some time with you in shallow water.
Don't make a big deal out of the rescue, simply acknowledge that the area he was in was not suitable. Point out an area where he could practice safely. Then show him some fishes in that shallow area and do something enjoyable, so at least he goes home with also some happy memories.
3.TRANSPORT
Tell the participant that:
In case your buddy is tired and needs a pull, an easy way to do so is to put your arm under his and tag him along like a hand bag. Either the right arms connect, or the left arms connect, up to you. Instruct the tired diver to maintain flat, to keep his ears under water and to look at the sky. The assisting diver can now snorkel while transporting the tired diver, if you got a long way to go then keep an eye on your direction and on boat traffic. Once you approach the shallows, make sure to have your mask on and snorkel in so you can look under water and avoid obstacles like sharp corals or big rocks. Practice this for about 25 meter.
4. HOW TO BE A SAFETY BUDDY
Tell the participants:
In lesson 1, we did our first dives and learned how to safety each other, we did safety each other from the surface and we practiced how to get the divers mouth out of the water in case he blacks out. In this lesson the safety diver will start going down to meet the diver to ESCORT him upwards. Even if you only want to go down half a meter, that is fine, just get the feel of it.
If your diver chooses to recover trough the snorkel then it’s handy if you as his safety buddy does the same so you can keep continues eye contact.
There is actually a way to clear the snorkel that takes no power at all, it's called the DISPLACEMENT TECHNIQUE. It only works when the snorkel is upside down, which it is when you're coming up from a dive and you're looking up to the surface. Once you’re one fist away from the surface passively exhale and the snorkel clears without effort. Now swiftly bring your chin back down and your snorkel will be completely empty without needing to blast.
As a safety diver you are giving a service to the diver. There are different things the diver could request from you. Your sign to start your escort dive could be based on:
1. Vision
2. Sign based
3. Time based
4. Turn based
for example, the diver could ask you:
“Once you see me coming up start coming down for me OK?” (Vision based)
“Once you feel me pull the rope 4 times or you hear me give 4 grouper calls start coming down for me, OK?” (Sign based)
“After 1 minute has past, start coming down for me, OK?” (Time based)
“When you feel me do the tumble turn, start coming down for me OK?” (Turn Based)
The diver recall sign: 4 tugs, 4 taps, 4 grouper calls or 4 boat engine revings is a sign to the diver to come up without delay. If the diver gives this sign of 4 it’s a sign to his buddy to come down for him.
If your diver asks you to meet him at a certain depth then make sure that you are very comfortable at that depth. After all you won't have a safety buddy yourself. Per definition, safety divers are solo diving. There is also no shame is saying “I can only safety you at the surface”, or “I can only meet you at 1 meter depth”.
Later, once you’re in the water, first practice a normal dive. And ask your buddy to come down for you when he feels you pull the rope or when he sees you coming up.
If you’re the safety, remember to keep your hand on the rope, relax, no body movements, practice the rope tugs that are asking "Are you still awake" and practice the grouper calls. The diver should say how often he likes to get signalled with. If you’re the diver, make sure to come up with the line, make sure to just float up and not swim up, make eye contact with your safety so he can easily see how you're doing. surface along the rope, next to your float, away from boat traffic and near your buddy.
BRINGING UP AN UNCONSCIOUS DIVER
During the second dive the diver will pretend to pass out at an appropriately safe depth for his safety buddy, he could simple close his eyes and stop moving. Or he could pretend to suffer a loss of motor control (LMC) and start shaking. In that case grab the diver and pull him up in any possible way that brings his mouth out of the water without delay. There are some different ways that this can be done, the main thing is that there are no delays and that in minimum time the mouth is being held out of the water. The rescue should also be gentle. When a diver suffers a loss of motor control he can often still see, hear and feel things, so be gentle to not add to the stress.
Make a habit of faking emergencies regularly like on every second dive of the session or randomly when you feel your safety buddy is less focused and efficient then you like him to be. Trust has to get earned. Don’t trust your buddy because he is a nice guy, or because he is family or has certain certifications. Trust him because he has responded appropriately to a multitude of fake emergencies. By that time his emergency response has become second nature, he conducts it in an automatic fashion.
5. EXITING,
Demonstrate:
How to Exit the water with a tired or unconscious diver. Once you can walk, take your fins off, stand behind the tired diver put your arms under his arm pits and grab one of his arms and just pull him towards the beach. Once it gets to shallow you better sit down, especially if the ground is uneven and could cause you to fall. Now put his arms under your knees and lock them on top of his hips. Then place your hands on the ground behind your back. Like this you can crab your self up on to the beach. The further you get, the harder it gets, take your time, If it gets really hard, then super charge your knees, pull one knee at a time towards you with two hands, like your spring loading them and then stretch out again. Maybe you only move one centimeter at a time and that is fine as long as you just keep going.
NO MASK DIVING
During this session we will also do a few dives without mask. This to not grow dependent on it. We don’t need the mask to dive. Even though your vision will be blurry you can still see enough to move around. It’s possible that some water enters your sinuses. Try to remain calm and to tolerate it. If you have contact lenses then close your eyes at the moment of transition from air to water or water to air to not accidentally loose a lens. Once fully immersed you can open your eyes again. Eventually not having a mask should not be a factor that reduces your diving time or diving depth.
A note of caution about
HYPERVENTILATION. This is when you do more then 2 breath ups.
Tell the participants:
“Let’s see what happens in your body when you hold your breath. Hold your hands in front of you. Your right hand represents your bodies O2 level and your left hand the CO2 level. What happens if you hold your breath? O2 goes down and CO² goes up. When CO2 is high enough it triggers your brain to breath, then the CO2 reduces again and O2 comes back up.
When you hyperventilate the O2 does not really go up much higher cause your blood is already saturated by default. But your CO2 drops lower and lower. Now if you hold your breath you can hold it longer. You never feel the trigger to breath. You could deplete your O2 without warning. This is called the SHALLOW WATER BLACKOUT; people have drowned due to this in bathtubs and swimming pools so don’t take it lightly. If you want to experiment with hyperventilation, then your bed is the safest place to do so. When you bring it to the water make sure your safety buddy wants to be part of it.
COACHING NOTES ON LESSON 3 NAVIGATION
Nautical navigation is a crucial topic often ignored up to instructor level. The reason for this is that many dive operators have boats and boat captains to drop of and pick up divers so in that way most navigational aspects of the dive are the responsibility of the boat captain. But at FCOA we like to promote shore dives since they are cost effective, time efficient and they come with less carbon foot print. There for the divers and coaches have to be self reliant. They have to be able to predict currents and in the water they have to be able to notice those currents. Also they have to be able to find under water obstacles and occasionally that requires the use of a compass.
Let participants watch video lesson 3 to add to retention.
The topics of this lesson are:
1. Making a position Fix
2. Compass Navigation
3. Tidal forecasting
4. Time Management
The bare minimum requirement for members to request a certificate of attendance of this lesson are that they must have practiced:
1. How to be a better safety (Including the displacement technique, Escorting and under water blackout response.
2. Panicked Swimmer Response.
3. Transport of a tired diver
4. Cramp Removal
5. Exciting an unconscious diver.
6. Make students aware of all NOTES OF CAUTION trough quiz or trough lecture.
This lesson can and should get done in shallow water if members are not yet cleared for deeper water. Repetition of skills in deeper water is optional. They don’t need to have mastered any of the skills, but they should have an understanding on how to further practice those skills on future dives.
7. MAKING A POSITION FIX
This is a stand up hands on briefing. Best to be conducted in a spacious area with sand or grass. Let participants hide a coin in the dirt and tell them to find aligned visual references.
The best visual references are:
1. Aligne permanent structures like far away radio towers with near by electrical polls in front of them.
2. By rocking the head side to side or by side stepping it should become clear how sharp an aligning is.
3. The two reference lines ideally are under a 90 degree angle.
Common mistakes:
1. Participants are not aligning two references, or the 2 references are so near that you can’t notice a difference when side stepping.
2. When finding back the coin participants walk to where they remember hiding it. Instead of focusing on the references.
2.COMPASS USE
If you’re further at sea and you have not many visual clews, then you can also use a compass, let's say there is only a tree to work with, then shoot a bearing to that tree. For example, 040 degrees. (Compass bearing are pronounced as 3 singular numbers so 14 degrees is pronounced as Zero One Four degrees)
The other visual clew might be a rock at 135 degrees. Now that the fix has been established move away from it.
If later we want to find it back then we first get to the area where we can see the visual references. Let’s say we can see the tree at 010 degrees, we have to move to the left till it becomes 040 again. Once we find it we will move along that bearing. The second fix has to become 135 again so we will move along the 040 bearing to the tree till 135 matches my second bearing which is the rock.
Making a fix with a compass will be less accurate as when you align some nice visual references, especially if the front and back visual references are far from each other than your fix becomes very accurate.
Freedivers usually don't wear compasses, but more and more mobile phones are becoming water proof and some of the dive watches have a compass integrated.
A compass can also proof handy when you want to swim in a straight line to a target. Let's say you're standing on the beach and see a diver in trouble, then it's good to shoot a compass bearing before you go in the water. Once you’re in the water it might be very hard to see your target, especially if there are high waves.
When you use a compass to swim a straight line, don't get fixated on the compass, only 10% of the time you should be looking at the compass and the rest of the time you should be looking ahead of you and around you, scanning for boat traffic and checking for current. What you can do is look over your compass, pick a rock or peace of coral that lays along your heading and then just swim to rock before you look at the compass again.
If you want to turn back where you came from, then you got to add or deduct 180 degrees to your outbound heading. That's not so easy without calculator, but there is a trick, what also works is to add 200 degrees and minus 20 or Minus 200 degreed and add 20. Like right now my outbound heading is 135 degrees + 200 = 335 minus 20 = 315 degrees. 315 degrees is my inbound or homebound heading.
3. TIDAL FORECASTING
Questions for Participants:
1. Google the word tidal forecast plus the name of a big costal city next to you and you should find some kind of tidal chart. What signifies the red dot? It’s the present time and water hight.
2. What time is the next high?
3. What time is the next low?
4. What is the hight difference?
5. Can you show me between your hands how much that is?
6. What is the grey and white area (day & night)
If you want to dive with minimum current then usually you can do so close to high tide or low tide. During high tide you usually have a bit better visibility, since fresh and clear ocean water has moved towards the shoreline, while during low tide there is a good chance that the muddy water from rivers and mangroves passes our dive area.
After you looked up the tidal forecasting, look at the map and make some kind of theory of how you believe the water will be moving. It will just be a theory, but you got to have something to later check if your theory works for the place you're diving.
7. What direction you think the current will move and why?
Ok so now we can go for a dive and check if our theory is true. We will get in the water, swim out a bit and then to know if we have a current, we will have to make a fix.
Waves and currents are 2 different things, if you are out there and there are high waves, but you're not moving from your fix, then there is no current. While if the sea is flat calm and yet you have to swim to stay on your fix, then you do have a current.
You can’t feel a current when you're in the sea, because your part of it. Only once you hold on to a mooring line you can feel a current.
4 TIME MANAGEMENT
For many participants time management is not cultural and not a habit. Yet when it’s presented to them as a game, they are most likely to enjoy the concept.
Questions for participants:
1. Based on the tidal forecast. What’s the best time to dive?
To be there in time let’s work backwards and list all we need to do to get there and the time it takes.
2. How long does it take to tie the buoy line?
3. How long it takes to swim out there?
4. How long it takes to change?
5. How long for the ride (maximum)
6. How long for breakfast
7. How long does it take you to wake up
8. Do you use a snoozer button? How many times you press it and what is the snoozer interval?
9. Now add up all those timings to calculate the time your alarm clock should go off.
REASONS TO ABORT A DIVE
1. During lighting it’s safer to be out of the water.
2. If the weather, waves or tides make it hard to exit or enter the water.
REVIEW QUESTIONS AFTER WATCHING THE VIDEO
1. What kind of objects your best to use for a visual fix
2. How can you calculate your turn around heading?
3. For your location, what time will be the next high tide?
4. What is the difference in cm between the next hight tide and low tide?
5. What causes tides?
6. What causes waves?
7. How long it takes for the moon to go around the world (from our perspective)?
8. How come that most days have 2 high and 2 low tides?
9. What time today the current will be the least?
10. What are two benefits of diving at the top of high tide?
11. When you float in the water, can you feel a current?
12. How can you identify a current?
WATER WORK FOR LESSON 3
1. Once in the water lay still and check for current. Is it what you predicted? Remember it to write ✍️ in your logbook.
2. Make a position fix of a unique under water object.
3. Predict your time of arrival at your dive spot.
4. Look out for boat traffic. Is there any? Can it kill you?
5. Once at the dive spot, check how good your time prediction is.
6. Repeat exercises of lesson 1 and 2.
7. On your way back to shore find back your position fix.
DEBRIEFING
Fill in your logbook, note the current and draw your visual references
FCOA Lesson 4, Coaching notes
COACHING NOTES ON LESSON 4A ROPEWORK
It takes time and repetition for participants to learn the most common knots. If time allows, they already could start practicing the most used knot in freediving, the clove hitch on lesson one with repeats in every session.
The knots freedivers use are:
1. The Clove hitch
2. The bowline
3. The double eight knot
4. The daisy chain
5. Storage
The bare minimum requirement for ropework is that the members at least must be able to tie the clove hitch on a single breath with their eyes closed in chest deep water. Some divers will never have a need for the other knots.
CLOVE HITCH,
It’s a self-tightening knot and it's what we use to tie the dive line to the bottom. The clove hitch consists out of 2 hitches turned in to the same direction and placed on top of each other. Participants can practice on their feet.
After you make the first hitch recognize its turning direction. The second loop, should be an exact copy of the first one. If you want to tie on to something that it bigger than your wrist, then make the clove hitch on the rope itself. Keep the tree (the long end) straight for clarity. Then it's the same routine. Now often the rope is so long that you want to make a clove hitch in the middle of it, in that case you would make it with a double rope.
When you are going to practice this knot in the sea, first practice tying it on to something in shallow water and then slowly find yourself deeper items to tie it on. You could tie it on existing mooring lines or mooring blocks. Tying it on to the reef should be a last resort, it will damage the reef and you're likely to cut yourself, however if you knot a permanent mooring line on the reef, it will mean the boats no longer need to anchor and anchoring is way more damaging to a reef then one single mooring line being tied to it.
A good thing about this knot is that you can easily loosen it with one hand, provided there is no tension on it. If you're the diver that is still on the surface while your buddy unties, then swim the float up current so there is no tension on the rope and it will be easy for your buddy to untie it.
THE BOWLINE
This is a non-slipping knot and it's what you would want to tie around your inner tube, because you don't want a knot that slowly gets tighter and bursts the tube. It's also a knot you can tie around a person if he is about to get pulled back to a boat.
Put the rope behind you around the waist and have the loose end on the right side, the loose end we call the snake. Now on the left, on the long side, make a lake, and besides the lake, have a tree, you can recognize the tree because it has roots that go below the lake. The other side is not a tree, it has no roods.
Now the snake comes out of the lake, goes around the tree and back into the lake. And now pull the tree.
There is also a blind version in case the visibility is bad or in case you're working with thick gloves:
Put the snake in your armpit. Now punch yourself in the stomach and then punch yourself against the chin. And have a look, do you recognize the lake? Do you see the tree? To keep it easy, keep the lake nice and big. Now simple pass the snake around the tree and pull your whole hand and snake out of the lake. And pull the tree, there you are. Try it one more time with eyes open and then one time with your eyes closed.
THE DOUBLE EIGHT KNOT
This is the only knot that does not get loosened by the combined action of shock loading and water movement. It’s the most secure knot to tie long term moorings.
After making a single eight knot about 1 meter down the line feed the one meter part trough the attachment point. Then run the loose end back trough the knot. Simple backtrack towards the ropes origin like a train on a train track.
THE DAISY CHAIN
If you want to store the rope in a bag, or you simple want to shorten a rope that is to long, then you can use the daisy chain. First of all, tie a clove hitch to your foot. Now make a normal knot but pool a loop trough. Now just stick your hand trough and pull trough the next loop, and the next, and the next. If you store a rope like this in a bag then it will probably not get tangled. The moment you want to use it, pull on the ending and the chain comes apart.
STORAGE
When you no longer need the rope you will want store it in away that it's tidy and ready for action. Measure one peace of rope from your chest to your hand and let it hang out of your hand. Now grab a full arm-span and put that on the opposite side of your hand, then repeat that taking turns by collecting the rope on the outside of your hand and on the inside of your hand. At all times if you sweep your hand down the rope it should be free, there should be no loops, because loops cause accidental knots.
Do that 4 times for now, then grab the rope by the throat, look at it as if its a puppet. Identify the head and the legs. Rap the long end around the legs and then properly lock that loop. The stability of the knot will depend on how tight you lock this loop. Then make at least 2 more turns towards the head. Now stick your hand trough the head, grab the rope, pull the rope trough as a loop. Put that loop over the head and around the throat and tighten it firmly. Now if you shake the rope, it should all stay in order. Usually its easier to store the rope in water then on land because in water it has no weight, you don't have to lift it.
THE NOOZE
This knot is also called the hangman's knot, or the suicide knot. And it’s particularly useful when tying a rope on a roundish rock. Of all knots the nooze can be applied the most snug leaving the least wiggle room for the rock to come out. After tying the nooze you could choose to tie another loop under a 90-degree angle ending with a double roped clove hitch. It now should look like you rapped up the rock to be a Christmas parcel. Try to shake the rock out f the nooze as hard as you can. If it comes out then you did tie the rock tight enough, just keep trying till you master this art.
THE FREE HANGING DIVELINE
Most freedivers prefer to dive on a free hanging diveline with a bottom weight. The benefits are:
1. Less slant in the line especially when there is a current
2. The depth markings are less distorted
3. A lanyard can get used
The bottom weight could be 6 to 12 kg. Make sure the bottom weight hangs clear of the bottom to not disturb or damage the bottom composition.
TYING ON
How to safety a diver that is about to tie on:
1. Let the diver relax on the buoy for a minute or two while the group pushes the buoy to the appropriate location and holds it in position if there is a current.
2. Ideally situate the buoy slightly up current to compensate for the distance the diver will drift back during the dive.
3. The diveline ideally is lighter then water and fully deployed, untangled and laying in a straight line on the surface.
4. The diver would hold the beginning of the rope. The safety buddy will have one hand on the buoy and the other on the diveline.
5. As the diver dives, the safety buddy should feed the rope fast enough to not obstruct the diver but slow enough to keep a sense of the divers movement.
6. The safety buddy should make an effort to keep the dive line as vertical as possible. This may mean he has to continuously swim in to a current.
7. The safety diver should visualize the actions of the diver. He could pull slightly on the diveline to feel if the rope is tied to the bottom. If that is the case then hold the line and buoy firmly for the diver to pull up on it. If it feels like the line is still in the divers hand then straight away slack again to not obstruct the divers movement.
NOTES ON LESSON 4B WEIGHT USE
The bare minimum requirement for members to request a certificate of attendance for FCOA lesson 4 is that they get to experience the neutral point. For non-swimmers this can get experienced in chest deep water by doing an upthrust measurement where you give them enough ballast to start sinking.
Before participants start using weights they should gain an understanding about the relationship between water pressure and air volume. And the best way to learn about that is by making your own syringe depth meter, what you need is a 3cc syringe, a black marker, a lighter, a pen, and a peace of paper.
First discuss how pressure builds up as we go down. Then after that address how pressure increase effects air volume. Let the students fill our ✍️ their pressure & volume table in the logbook.
One bar of pressure is caused by the atmosphere, the air that we breeze is pressing down on us with a pressure of 1 bar. Now for every 10 meter we go down we get an extra one bar of water pressure so at 10 meters you have 1 bar of water pressure plus the one bar of air pressure above the water is a total of 2 bar. Ask: “How about 20 meter? And how about 50 meter?”
Then discuss what happens to a 1 liter baloon that we take on a dive. It will be 1 liter at the surface and as you take it down it will become smaller, but how big will it exactly be at for example, 10 meter? To calculate this you simple have to DEVIDE THE ORIGENAL VOLUME BY THE PRESSURE.
At 10 meter 1/2
At 20 meter 1/3
At 50 meter 1/6
Tell the students to draw the baloon sizes behind each depth.
Now they are ready to make their own depth meters. Ask then how big their syringe is? Tell then to put the plunger on 3 ml. Then get them to seal the syringe tip with a lighter, it needs to get melted for about 4 seconds so no air can go in or out. And then 3 ml will be the starting point, tell them to write 0M next to 3ml: Zero Meter
Then ask: when you bring this syringe to 10 meter, what will happen to the volume? Remember? You will have to devide the original volume of 3ml by the Pressure of 2 bar. The plunger will stop at 1.5ml. Write next to 1.5 ml: 10M
How about 20 meters? 3 devided by 3, thats 1ml. Write 20 M there.
And 50 meter? 3/6 = 0.5ml.
Get them to complete the depth scale ask them what the pressure at 5 meter is. The pressure at zero meter is 1 and at 10 meter is 2 so at 5 meter It's 1.5 bar.
Let them use a calculator or just provide the answer. 3: 1.5 = 2ml write 5M to the 2 ml mark.
And what is the pressure at 2 meter? It's 1.2 3/ 1.2 = 2.5
They have now completed the depth gauge scale.
Now melt the syringe tip for 4 seconds to seal it. Don't be to eager to press the plunger, because the melted plastic needs to harden first. Tie a loop on the plunger so you can loop it around the dive line ready for use.
Don't tie it around your wrist cause that would create an entanglement hazard.
THE SYRINGE AS YOUR MIDDLE EAR
Lecture the student(s) “Imagine that the syringe is your middle ear and the plunger is the ear drum. You don’t want the ear drum to move because it hurts.
How much air you need to equalize in to the middle ear when diving to 10 meter?
On the syringe you can see that in the first 10 meter you loose half the volume, you loose 1.5 ml of volume of your 3 ml syringe. So you need to equalize 1.5 ml in to the middle ear.
How about when you decent further from 10 to 20 meter? How much extra air you need to equalize in to the middle ear? It's only 0.5 ml.
For that reason, in the first 10 meter of your dive you need frequent equalization. Once you go deeper the need to equalize becomes less frequent.
Also your lungs reduce to half their size when you dive to 10 meter and the amount of liters you loose are equal to the amount of kilograms bodyweight you gain. If you loose 2 liter at 10 meter you become 2kg heavier. As you continue to 20 meter you will continue getting heavier but from 10 to 20 meter it would only add 0.7 kg.
Let a student read out the definition of the Neutral point.
On the surface you are floating but as you go down you get heavier until at a certain depth you no longer sink or float and that is your neutral point, that is when you can let go of the rope and you would not sink or float, you would just stay there. Now for some divers this neutral point could be at a deep depth like 20 meter.
Ask a student to read the 3 questions in the logbook.
By wearing 2lbs weight we will bring your neutral point closer to the surface to for example 10 meters.
That would mean you only have to swim or pull till 10 meter, after that you can start gliding. Gliding is like falling down while holding your body in a streamlined position. Now on the way up you will have to work, swimming or pulling but only until your neutral point. Above your neutral point you can simple glide and slowly float up to the surface.
WATERWORK LESSON 4
1. Tie a Clove Hitch at the surface
2. Dive down and tie the clove hitch at depth
3. On your next dive you will wear a 2lbs weight belt. It should be easy to release in case of an emergency. When you handle the weight belt always hold it by the strap end so that the weights can't accidentally slip off. When you dive down be aware that now your likely to descend faster and need to equalize faster. Try to find your neutral point then pull up counting your arm spans to estimate your neutral point depth with 2 lbs. Remember this for your logbook ✍️
4. Then dive again and once you pass the neutral point try to glide a few meters down. Your way up will take more effort as before. Again once above the neutral point, try to glide up being motionless.
5. Repeat exercises from the last lessons especially black out responses. Try to break your personal best duration and your personal best depth.
